
Brake Maintenance Guide for Audi Owners


Maintaining the brakes of your Audi is crucial for ensuring not only optimal vehicle performance but also your safety on the road. Proper brake maintenance can enhance the longevity of your braking system and improve your vehicle’s overall responsiveness. Understanding the fundamental aspects of how your Audi‘s brakes work, including the components involved and the signs of wear, is essential for any responsible owner.
The braking system of your Audi is a complex assembly that requires regular attention. From brake pads and rotors to the master cylinder and fluid, each component plays a vital role in your car’s ability to stop efficiently. Neglecting these parts can lead to decreased performance, increased stopping distances, and even costly repairs down the line. This guide will provide detailed insights into the maintenance tasks needed to care for your brakes, ensuring they remain in top condition.
By following a consistent maintenance schedule and addressing any issues promptly, Audi owners can enjoy a safer driving experience while potentially saving on repairs. This comprehensive guide will outline the necessary steps and recommendations to help you manage your Audi‘s brake health effectively. From routine inspections to replacing worn-out components, every aspect is covered to empower you as a knowledgeable and proactive vehicle owner.
Identifying Signs of Brake Wear in Audi Vehicles
Regular brake maintenance is crucial for the safety and performance of your Audi. As brake components wear down over time, it is essential to recognize the signs of brake wear to address them promptly. Below are the key indicators to watch for in your Audi’s braking system.
- Squeaking or Squealing Noise: A high-pitched squeak can indicate that the brake pads are worn down and need replacement. Most modern pads are equipped with wear indicators that create noise to alert the driver.
- Grinding Noise: If you hear a grinding sound while braking, it may indicate that the brake pads are severely worn, exposing the metal backing. This can cause damage to the rotors and requires immediate attention.
- Vibration or Pulsation: If you feel a vibration in the steering wheel or pedal when applying the brakes, this could mean that the brake rotors are warped or unevenly worn. It is important to inspect and possibly replace them.
- Soft or Spongy Brake Pedal: If your brake pedal feels soft or spongy when pressed, it may be a sign of air in the brake lines or low brake fluid. This can reduce braking efficiency and requires immediate investigation.
- Increased Stopping Distance: If you notice that your Audi takes longer to stop, this could indicate brake wear. Reduced braking power can compromise your safety on the road.
- Brake Warning Light: If the brake warning light on your dashboard illuminates, it is an immediate sign that you should check your braking system. This could indicate low brake fluid or other brake system issues.
Being proactive about these signs of brake wear can enhance your driving experience and ensure the safety of you and your passengers. Regular inspections and timely repairs can help maintain your Audi’s braking system in optimal condition.
Step-by-Step Guide to Replacing Audi Brake Pads
Replacing brake pads on your Audi is essential for maintaining optimal braking performance. Follow these detailed steps to ensure a successful installation.
Materials Needed: New brake pads, brake grease, jack and jack stands, lug wrench, socket set, torque wrench, and a C-clamp or brake caliper tool.
Step 1: Prepare Your Vehicle – Park your Audi on a flat surface and engage the parking brake. This prevents the vehicle from rolling while you work.
Step 2: Loosen the Lug Nuts – Before lifting the vehicle, slightly loosen the lug nuts on the wheel where you will be replacing the brake pads. Do not remove them completely yet.
Step 3: Lift the Vehicle – Use a jack to lift the front or rear of the car where the brake pads will be replaced. Secure the vehicle on jack stands to ensure safety.
Step 4: Remove the Wheel – Finish removing the loosened lug nuts and take off the wheel to access the brake caliper.
Step 5: Remove the Brake Caliper – Locate the bolts securing the brake caliper. Using a socket wrench, remove the caliper bolts and carefully lift the caliper off the rotor. Support the caliper using a hanger or a bungee cord; avoid letting it hang on the brake line.
Step 6: Remove Old Brake Pads – With the caliper removed, slide out the old brake pads from their mounting brackets. Note their orientation as you will need to install the new pads similarly.
Step 7: Compress the Brake Caliper Piston – Use a C-clamp or brake caliper tool to gently push the caliper piston back into its housing. This allows space for the new, thicker brake pads. Ensure the reservoir cap is loosened to avoid pressure build-up.
Step 8: Install New Brake Pads – Apply a thin layer of brake grease on the backing plates of the new pads to reduce noise and ensure smooth operation. Slide the new brake pads into the bracket in the same orientation as the old ones.
Step 9: Reinstall the Brake Caliper – Carefully position the caliper over the new pads. Make sure the caliper aligns with the mounting holes and reinsert the caliper bolts. Tighten them to the manufacturer’s specifications using a torque wrench.
Step 10: Reattach the Wheel – Place the wheel back onto the hub and hand-tighten the lug nuts. Lower the vehicle from the jack stands and then snugly secure the lug nuts in a crisscross pattern to ensure even pressure.
Step 11: Test the Brakes – Before driving, pump the brake pedal a few times to position the new brake pads against the rotor. Check the brake fluid level and top it off if necessary.
Step 12: Dispose of Old Parts – Properly dispose of the old brake pads according to local regulations to ensure environmental safety.
Following these steps will help you effectively replace the brake pads on your Audi, ensuring a smooth and safe driving experience.
How to Check and Maintain Audi Brake Fluid Levels
Maintaining the correct brake fluid level is crucial for the safety and performance of your Audi’s braking system. Low brake fluid can lead to brake failure, compromising your vehicle’s stopping power. Follow these steps to check and maintain your Audi brake fluid levels effectively.
1. Locate the Brake Fluid Reservoir: The brake fluid reservoir in your Audi is typically found near the back of the engine bay, close to the driver’s side. It is usually a translucent plastic container marked with “brake fluid” or has a brake symbol. This allows for easy visibility of the fluid level without opening the cap.
2. Inspect the Fluid Level: Check the fluid level against the markings on the side of the reservoir. The levels should fall between the “MIN” and “MAX” indicators. If the fluid is below the “MIN” line, it needs to be topped up. If the level is consistently low, it may indicate a leak or worn brake components.
3. Identify the Correct Brake Fluid: Ensure you use the correct type of brake fluid recommended for your Audi. Most Audis require DOT 4 fluid, but it is essential to consult your owner’s manual for the specific requirements for your model.
4. Add Brake Fluid (if necessary): When adding fluid, first clean the cap and area around the reservoir to prevent contamination. Open the cap and add brake fluid slowly, ensuring not to overfill. Replace the cap securely after filling.
5. Regular Checks: Make it a habit to check your brake fluid level regularly, especially before long trips or after significant driving changes. Keeping an eye on the fluid level helps you detect any potential issues early.
6. Monitor for Contamination: Brake fluid can absorb moisture over time, which reduces its effectiveness. If the fluid appears dark or cloudy, it may be time for a complete brake fluid change. Consult a professional for a complete brake system inspection if you notice any signs of contamination.
7. Seek Professional Help: If you are not comfortable checking or changing the brake fluid yourself, or if you encounter any issues such as unusual brake performance, it is advisable to consult a professional mechanic. Regular brake maintenance ensures your Audi remains safe and reliable on the road.
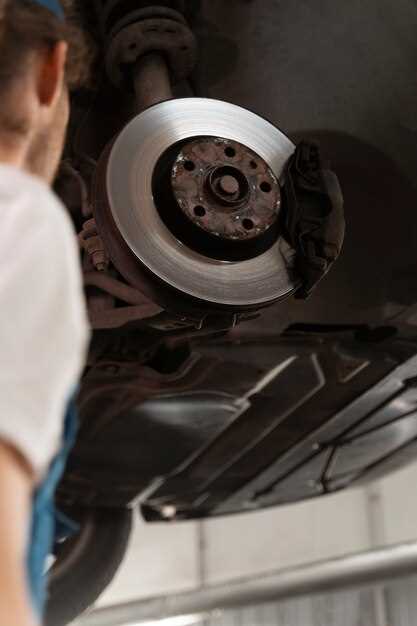
Understanding Audi Brake Rotor Replacement: When and Why
The brake rotor is a crucial component of your Audi’s braking system. It works in conjunction with the brake pads to create the friction needed to slow down or stop the vehicle. Over time, brake rotors can wear down or become damaged, necessitating replacement to ensure safe driving conditions.
When to Replace Brake Rotors: It is essential to monitor the condition of your Audi’s rotors. A common indicator that replacement is needed includes vibrations or pulsations felt in the brake pedal during braking. Additionally, if you hear grinding noises, this can signal that the rotor surface has become compromised. Regular inspections can help detect wear and tear, typically recommended every 15,000 to 30,000 miles or during routine service checks.
Why Replace Brake Rotors: Driving with worn or damaged rotors can lead to decreased braking efficiency and an increased risk of accidents. Moreover, deteriorated rotors can cause premature wear to the brake pads, leading to more costly repairs. Replacing the rotors is not just a matter of enhancing performance but also maintaining your Audi’s safety standards.
Another reason for rotor replacement is the heat generated during braking. This heat can cause warping, leading to an uneven surface that affects braking effectiveness. For optimal performance, it’s advisable to replace the rotors when replacing the brake pads to ensure a uniform surface and prolong the lifespan of both components.
In summary, understanding when and why to replace your Audi’s brake rotors is vital for maintaining optimal braking performance and ensuring the safety of you and your passengers. Regular maintenance checks and immediate attention to any warning signs will keep your braking system functioning correctly.
Tips for Troubleshooting Common Audi Brake Issues

Maintaining the braking system of your Audi is crucial for safety and performance. Here are some practical tips to help you troubleshoot common brake issues:
- Squeaking or Grinding Noise:
- Check brake pads for wear. Worn pads may need replacement.
- Inspect the rotors for grooves or uneven wear, as they may require resurfacing or replacement.
- Ensure that brake dust is not causing noise; clean the brake components if necessary.
- Spongy Brake Pedal:
- Examine the brake fluid level. Low fluid can cause sponginess.
- Look for air in the brake lines; bleeding the brakes may resolve this issue.
- Inspect for leaks around the brake lines or master cylinder, which could lead to fluid loss.
- Pulling to One Side:
- Check tire pressure on both sides to ensure they are equal.
- Inspect brake calipers for proper function; sticking calipers can cause uneven braking.
- Examine suspension components, as misalignment can lead to pulling as well.
- Car Vibration while Braking:
- If you feel vibrations, check the rotors for warping. Warped rotors need to be resurfaced or replaced.
- Inspect the wheel alignment; misalignment can cause vibrations when braking.
- Review the brake pads; uneven wear could also be a contributing factor.
- Warning Lights:
- Monitor dashboard warning lights. A brake warning light indicates low fluid or other issues.
- Use a diagnostic scanner to check for error codes if lights persist.
- Have your vehicle inspected by a professional if lights continue to illuminate.
Regular maintenance is key to preventing brake problems. Always refer to your Audi owner’s manual for specific maintenance schedules and recommendations, and consult a professional mechanic if you are unsure about any brake issue.
When to Seek Professional Audi Brake Services
As an Audi owner, ensuring the safety and performance of your vehicle’s brakes is paramount. While regular maintenance is essential, there are specific situations when seeking professional brake services becomes crucial.
| Signs of Brake Issues | Recommended Action |
|---|---|
| Unusual noises when braking (squeaking, grinding) | Visit a professional to diagnose potential wear or damaged components. |
| Pulsation or vibration in the brake pedal | Seek an expert opinion as this may indicate warped rotors or imbalanced components. |
| Brake warning light on the dashboard | Immediate inspection is necessary. This light often signifies a critical issue. |
| Soft or spongy brake pedal | This could indicate air in the brake lines or fluid leaks. Consult a technician promptly. |
| Increased stopping distance | A professional assessment is needed to determine the root cause and ensure safety. |
Regular inspections and maintenance can prevent many of these issues. However, if you experience any signs of brake problems, do not hesitate to contact a qualified Audi service center. Adequate brake function is essential for your safety on the road.


